Florida Home Grown Pineapples
How To Grow, Protect, Pick and Prepare Your Back Yard Pineapple Crop
Our pineapple story started innocently enough about 40 years ago, when we purchased a couple pineapples from Winn-Dixie in Oneco, Florida (which has been gone for decades). My young daughter liked them so much we decided to see if we could grow some. We cut off the tops, dried them, and planted them. Little did we know the path that simple act would take us down.

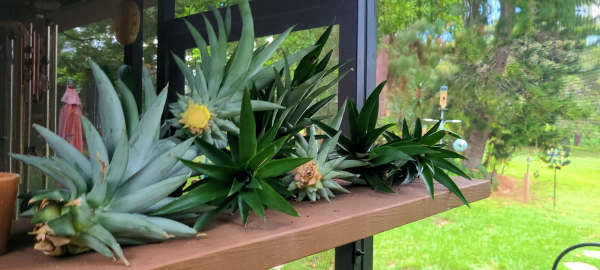
The first pineapple plants we planted grew for a couple years, but then surprised us with a new pineapples. We were amazed and it tasted much, much better than the ones from the store. Seeing that success, we cut the tops off those tops, planted them, then math kicked in. As of now we have right around 60 plants all from the same original two. We have given away quite a few of them but only with the promise that whoever we give one to, has to cut off the top and plant it. So, we have dozens upon dozens of offspring pineapples growing around the Sarasota/Bradenton area. There are many on the east coast of Florida, a few places up the eastern seaboard and even as far north as New York. I have even planted a few behind places I have worked. We joke that our pineapples are out to conquer the world (MUH-HA-HA-HA), but sometimes I wonder if they have a master plan.
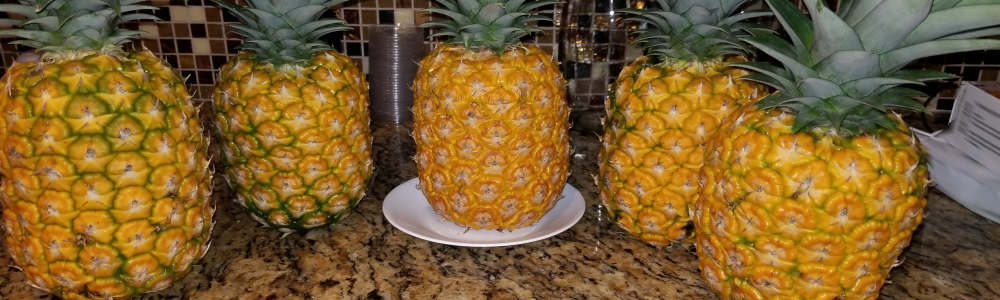
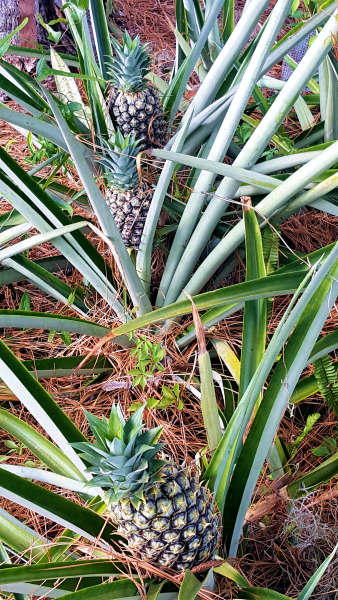
Over the years we have learned more about pineapples then we ever thought we would. The biggest lesson was that pineapple really doesn’t ripen and sweeten after its picked. It ages, but it doesn’t ripen. If all you have eaten is store bought pineapples, you really don’t know what you’re missing. The ones in the store are picked early so they have a longer shelf life. After they are picked, they do not sweeten anymore. On the plant, when they turn golden yellow, they are a whole new experience, so sweet and tender that you probably won’t buy another one at the store again. When they turn totally or almost totally golden yellow, that’s when they are perfect to eat. The problem, as we found, the critters know this, too.
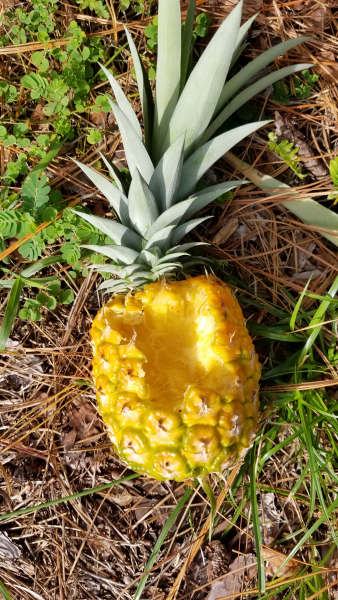
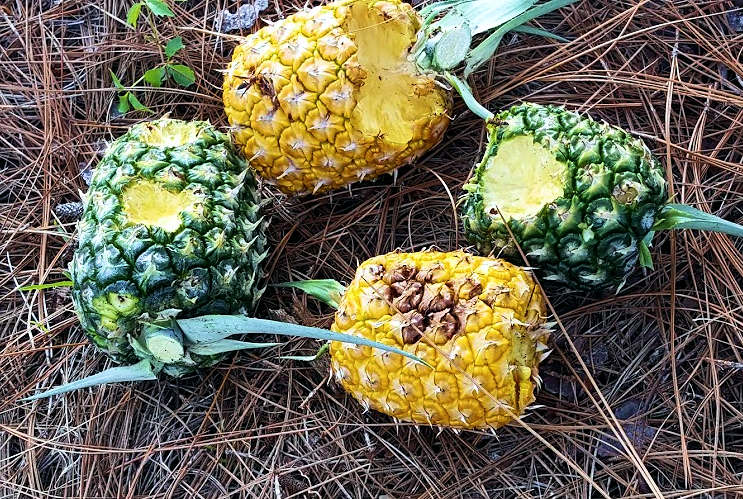
That’s where the idea came from for this webpage. To try to help you protect your crop and enjoy it, too. You watch that little pineapple fruit pop up, then watch it grow, see it get to be the size of a football and then start to turn golden yellow. Then one day you go to check on it and you find that a raccoon, squirrel, deer, or some other critter, has eaten away half of it. And regardless of what you may think, I would highly recommend you cut the top off, toss it out in the yard and let them eat the rest. No telling what kind of germs or contaminants that critter left behind.
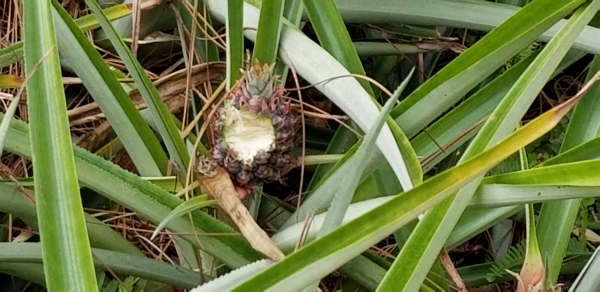
We have seen our share of pineapples eaten, even when they were only the size of a golf ball. That started me down the path to protect what I invested time in. I think I sort of have it down to a science as we only lost one this year. So let’s start at the beginning, growing your first pineapple.
You will find dozens of ways people suggest starting pineapples but I like to keep things simple. For the most part, the natural Florida sandy soil is great for pineapples. The biggest enemy of good growth for a pineapple is wet ground. They need drainage and they do survive well during droughts without much care. You can cheat and buy a planted pineapple, but the fun is knowing you started it from scratch.
When you pick a good healthy looking pineapple at the grocery store, cut the top off leaving a little bit of meat at the bottom of the stem. You can flick that off pretty easily with a knife. Once you have it cleaned off, find a place outside or on your porch and set it someone, preferably not in direct sun. The next step? Wait a few weeks and let it dry out. You can do it sooner, but I have found that a couple weeks works best. If it started shrivel up, it may be too late to plant but you can always try. I have found tops I forgot about in our yard for half a year and then still grew. Pineapples are pretty tough.
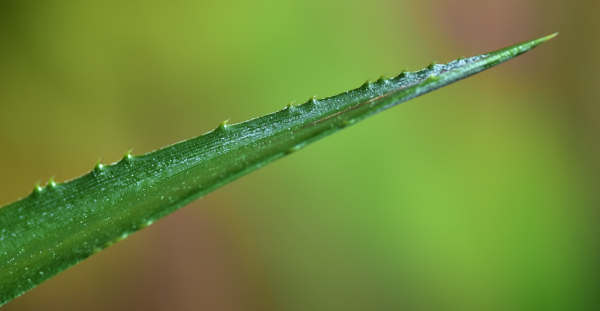
Once it has dried out, find a good place in the yard to plant it with sandy soil and almost full sun. I have found ones that get more than a half day sun don’t do as well. One thing to keep in mind, pineapple leaves can grow to a foot and a half or more, and the tips are like hack saw blades (or worse), so don’t plant them where someone may accidentally brush against them.
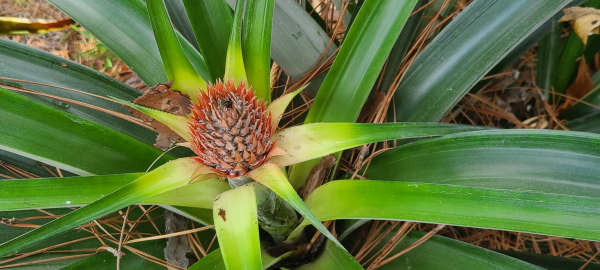
Now the waiting game. Often it takes a plant a year or two to fruit, sometimes even longer. Be patient. Usually you will see the baby pineapple pop up in the middle as a small purple-ish round flower. You don’t need to protect it at this point as unripe pineapples are not sweet and can cause digestive issues. But this would be a good time to prepare.
Protecting your pineapple fruit is a multifaceted approach. Protection, prevention and patience. For full protection this approach involves a protective cover, securing it in place, and using non-toxic methods for keeping the critters away. For the first step, we make a protective cover.
My preference is to use a ¼” X ¼” mesh fence style material. A good source is at Lowe’s (yes, I’m plugging a nearby store).
Acorn Hardware 5-ft x 3-ft 23 -Gauge Silver Galvanized steel Hardware Cloth Rolled Fencing 1/4-in x 1/4-in - Mesh Size Item #3210921 / Model #HC4365 / $25.03
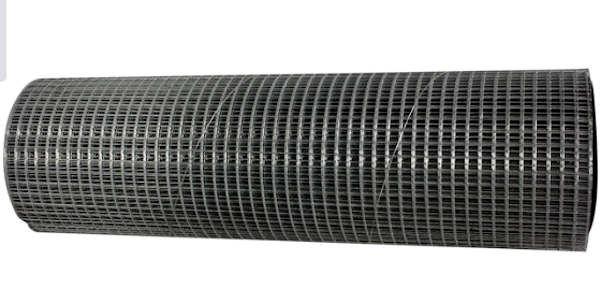
You’ll need some snips or wire cutters to cut this, and be careful, the cut wires are VERY SHARP. I highly recommend gloves. Cut pieces 32”-36” long and leave the 36” width. You will also need some bailing wire, some type of wire or zip ties to “connect the ends together. Many times this roll of mesh has a small wire holding it round and you can use that.
Video tour of covered pineapples - HERE
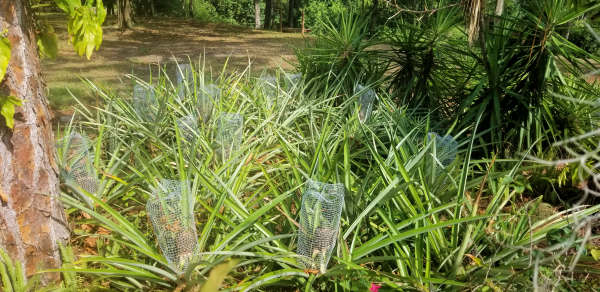
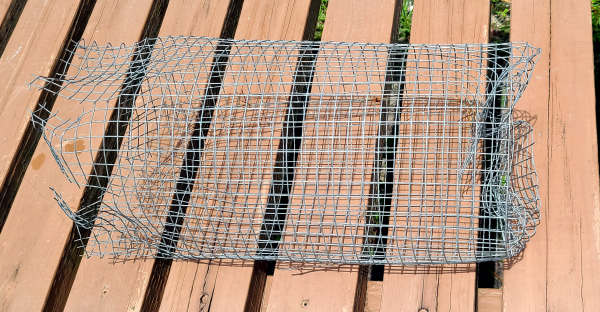
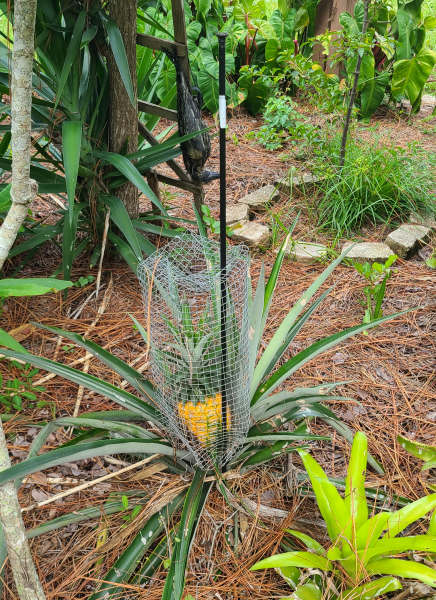
Roll this into a tube that is 10”-12” in diameter and 36” (3ft) tall. Once you have that constructed, at one end, fold the sides over to enclose the top. You may have to tie some of this together so the top is now closed. At the other end, make some cuts up the side (3 or 4) up about 4” or so. This allows you to fold the mesh around the base of the pineapple fruit. You now have the primary protection ready.
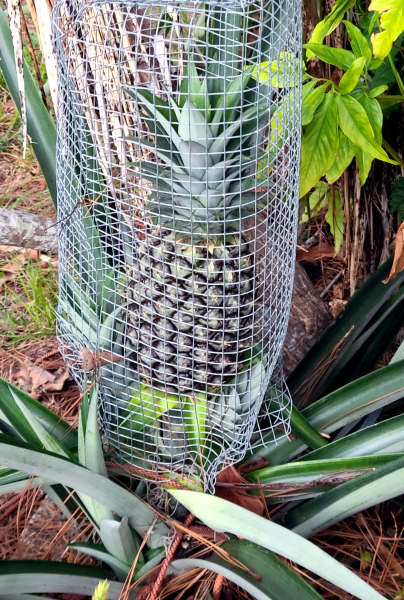
When your pineapple gets to be around baseball sized, slide the tube over the entire fruit and the leave growing out of the top. Do not pull it down too far as you want to leave room for the fruit and top to grow. Once you have is slid over the fruit, bend the slit ends close to the base of the pineapple and you’re all set. BE CAREFUL doing this, when you’re bending the bottom in, if you push too hard you can You may think you’re all the way safe, but think again.
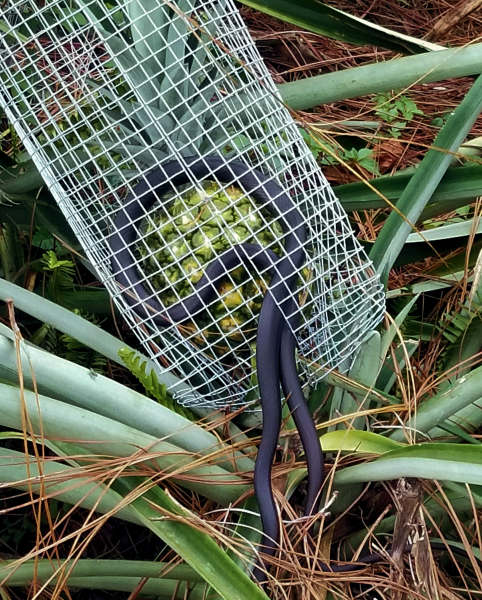
We used this as our primary protection for a long time and would still loose about half our fruits. Some critters would manage to pull the mesh up and expose the bottom of the fruit and take a few bites. Others would get the mesh completely off and eat the pineapple to the core. We have even gone to check on a near ripe pineapple only to find the pineapple and the mesh were both gone. Only to find them 50ft away and the whole bottom eaten out of the pineapple, still in the mesh, but broken off the plant. And sometimes Mother Nature gives your pineapples a little extra protection.
If you’re in a dense community, you may find that the mesh is enough. But if you are surrounded by wildlife, like we are, you need to step it up some more. So here’s step 2 to better protect your pineapples. Once again, you can drop by Lowe’s and pick up some big long spikes that look like gigantic nails.
YARDLINK Multi-Purpose 4-1/2-ft H x 1-1/2-in W Powder-coated Steel No Dig Garden Decorative metal Fence post
Item #865725 / Model #795027 / $6.88/each
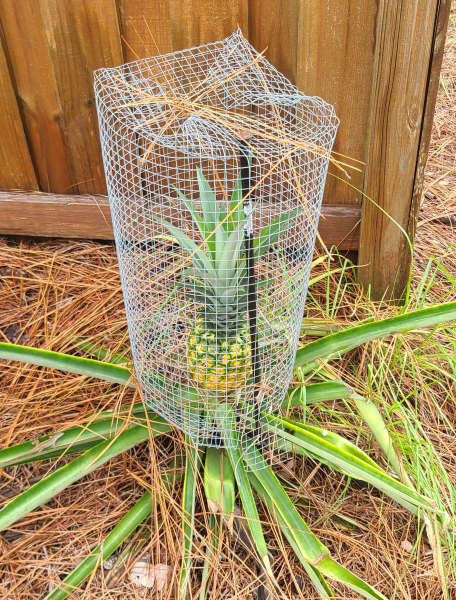
These just so happen to be the same size as the mesh in the covers you made. Once you put the cover on, wiggle this through part of the folded over top of the cover, then when you get to the base of the pineapple, wiggle it through the leaves until you reach the ground. You can push them in and that’s pretty secure to hold the cover in place, but the cover can still be slid up the post and lifted. The most secure way is to drive this into the ground, until the head of the post (looks like a nail head) is against the mesh at the top of the cover. This completely secures the cover down onto your pineapple, pretty much impossible for a critter to lift it up or bend it over.
Do not try to drive the post into a tree root unless you never want to get it out to enjoy your pineapple. You can drive it into tough dense soil with a hammer, but keep in mind you will have to get it out. My trick to getting stuck posts out is to clamp a pair of vice grips onto the post just under the head, then hit upward with a hammer until it is loose enough to pull out. Another helpful hint, the base of your pineapple will be the perfect environment for ground dwelling wasps. It’s only happened to me once when I drove the post right into an underground wasp nest. My shorts and sandals were no match for a platoon of upset wasps. Lesson learned.
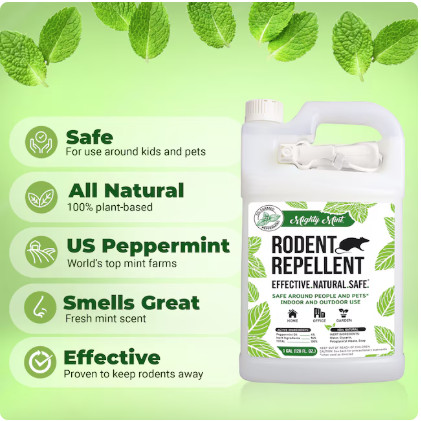
Now the third stage of protection, and you can do this by itself, with either, or both the previous methods. Scent protection. Critters, and I mean all critters, absolutely HATE the smell of mint. You can buy mint spray at Lowe’s.
Mighty Mint Peppermint Oil Spray Rodent Repellent
Item #5031335 / Model #RS-15 / $9.98/each
This is 100% safe, it even keeps most insects off, and it makes your yard smell minty fresh. You can use this on other plants or vegetables, too. I was pleasantly surprised when I stumbled across this fact. Keep in mint a good afternoon thundershower will wash most of it away, so you may need to reapply. You can buy other repellents like Repels-All or Deer Scram, but they don’t have a pleasant odor and are not as safe as mint spray.
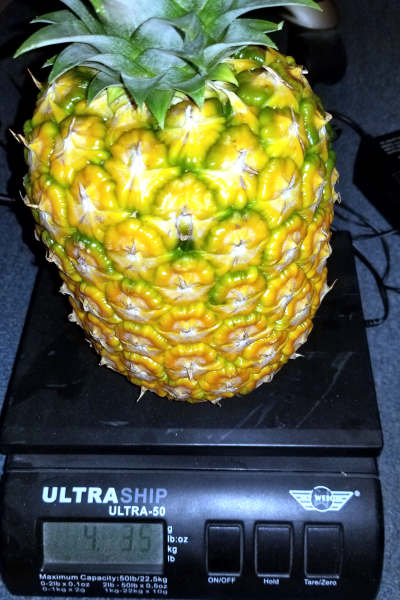
So how do you know when your pineapple is ripe? It’s that golden yellow that is the true sign of a ripe pineapple. You will see it start to turn from the bottom up. Don’t get impatient. If there’s a little green left in the seams, that’s okay, but best to let it sit until it turns completely golden. When they are completely ripe, remove the post, un-bend the bottom of the cover and remove it. Then grab the pineapple fruit by the leaves and give it a quick hard twist while you’re bending it over and it will snap off. Usually. Have a knife ready just in case.

When you pick your pineapple, you may see more little plants growing off the stem at the base of the fruit. These are called suckers. You can pick those off and plant them, they will grow into new plants just like the tops. If you leave them, they can grow into a new pineapple off the original base. Now I know they say a pineapple plant only fruits once, but I swear some of mine have fruited multiple times. That’s still up for debate but I do know my more mature plants do fade after a while, or a sucker will grow off the original plant.
Once you have picked your fresh pineapple, the options are endless. But you have to get to the meat of fruit. You can buy commercial coring devices and I have a few, but they seem to waste a ton of meat. This is my technique, feel free to try your own.
I cut the top off, remove the meat from the base and set it outside to dry. Then I cut the base off, cutting as little as I can to clean it up but not waste that precious golden meat. Then I stand it up on end and with a super sharp serrated knife, I slice down the sides like peeling a banana. When you do, you will see the eyes of the pineapples. A hard core where the individual flower grew. There are several techniques to remove them and I highly recommend you do, unless you want to be spitting them out like sunflower seeds.
I simply use the point of a sharp knife and dig a little divot around them and pop them out. Others will cut a spiraling groove around the fruit moving downward as you go around. The eyes will have a pattern you can follow. Then make tools for removing the eyes, to me they are useless. But if you find one that really works, let me know. Also, if you happen to get a pineapple with thousands of tiny black dots in it, you’ve got a rare one. Every now and they you get a pineapple that actually grows seeds. Won’t harm you and probably harder to grown pineapples from them, but that’s all they are. Unless they’re crawling around, not seeds, throw that one out.
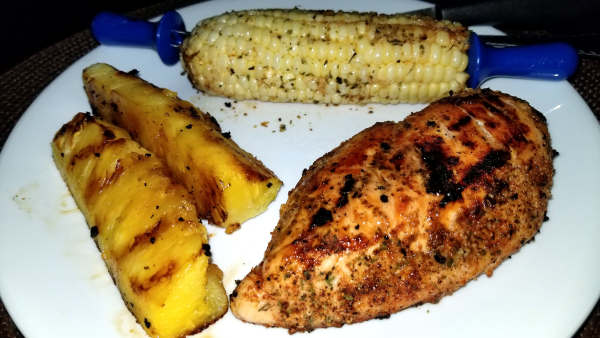
After removing the eyes, what you do next is dependent on what you want to do with the fruit. If you’re just going to eat it raw, quarter it down the middle, cut off the core and go for it. If you want to grill it, you can either do that or cut it in slices and cut out the core. Or you can do what we occasionally do, my little recipe for smoked pineapple and chicken (or ham). I posted it online:
BBQ Smoked Stuffed Whole Pineapple
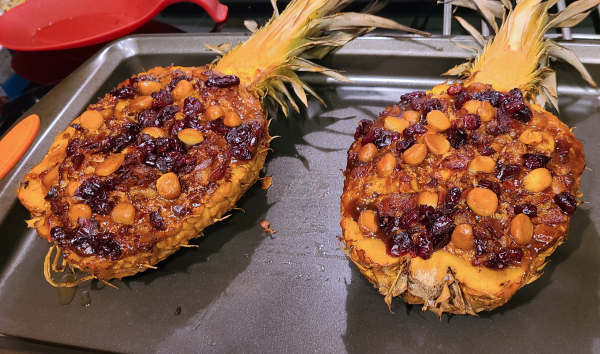
Basically, you don’t remove the top. Cut the pineapple in half, including the top, core it out, drain the juice, mix the cut up pineapple with BBQ pulled chicken, BBQ pulled pork, cut ham, whatever you want. Top it with bacon bits, candied pecans, cranberries, whatever you want. Throw it in the smoker at 250° for 1-1/2 hours and you have a feast fit for a kind and queen. Keep in mind, pineapples contain bromelain, the main ingredient in meat tenderizer. The less ripe the pineapple is, the higher the levels of bromelain. So, if you let meat mixed with it, sit too long, it will turn your meat to mush. Have fun with it.
Hope this helps you with your home grown pineapple crop. Keep in mind how lucky we are. We have relatives in New Zealand and you cannot buy a pineapple with a top on it there. Just for the reason people would grow their own. So good luck, good growing, and enjoy!